This review is from: Poolmaster 18-Inch Outdoor Clock/Thermometer/Hydrometer, Red (Lawn & Patio)
I have had this clock a little over a month. New batteries will not keep it running and now the hands have come loose and are just flopping. It is going in the trash because the time is up to return it. It is a defective product.
Help other customers find the most helpful reviews
This review is from: Poolmaster 18-Inch Outdoor Clock/Thermometer/Hydrometer, Red (Lawn & Patio)
Unfortunately. I didn't read the other reviews about the red version of this clock before buying. Amazingly, the white version has good reviews. The clock looked very nice hanging on our patio wall, but after about 2 days, the minute hand stuck on the humidity hand. I took it apart to fix the hands to have clearance, but as I was putting the glass back in, it shattered. I was being very gentle, but the glass was so thin that just a small amount of pressure on the edge as I was trying to get it in the rubber seal shattered the whole thing. The hands were also very thin which is why they got in each others way. Probably a temperature change affected their shape. It went in the trash. If you have one and the hands catch on each other, send it back and get a different type.
Help other customers find the most helpful reviews
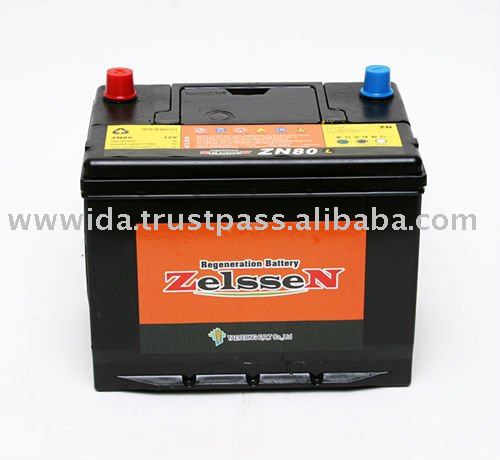
A car battery lasts many years and today's' batteries are generally maintenance-free, meaning that from the moment one is fitted, you don't have to touch it again until it needs replacing.Some car batteries have a battery condition indicator on the top, so get to know when the condition of the battery is deteriorating.Other than that, the only other method for determining the state of your battery is to use a voltmeter to test for voltage and a hydrometer to test the condition of the acid in the battery.The latter method is only required if you have a battery that isn't sealed and has removable cell caps.However, it's likely that you don't think twice about the condition of the battery until one morning you find your car doesn't start due to a dead battery.During the day, when you keep using your car, the battery is kept warm and gets charged.However, if you have cell damage; and it only takes one of the six cells, then the temperature at night means that any charge in the cell can dissipate and you are not left with enough voltage to start your car.Unfortunately this tends to happen without warning and it seems to always be on the first really cold morning that it happens.It's generally a fairly simple process to replace your car's battery and in most cases very few tools or mechanical knowledge is necessary.Importantly, it's also substantially less expensive if you replace the battery yourself, rather than getting a garage to do it.Firstly, remove both the cables from the battery terminals.You'll need a suitably sized wrench to loosen the bolts on the cable clamps, and then just simply lift them off the terminals and push them away from the battery.Check around the battery to find the bracket that holds the battery on the battery tray.All car batteries connect differently, so it's a matter of locating the bracket that holds the battery in place.It could be on the side or top of the battery.Use a wrench or screwdriver to loosen the nuts or screws holding the bracket in place.You will find the bracket can be moved, once the nuts or screws are loosened enough.Slide the bracket out of the way.Lift the battery from the battery tray.Put the new battery onto the battery tray; make sure you have the battery terminals facing the same way as the one you removed.Replace the bracket and tighten the nuts or screws.Check the battery is held tightly in place.Reconnect the two battery cables to the battery terminals.On the top or to the side of each terminal you will find the polarity of each terminal.One is labeled "+" and the other "-." Connect the black cable clamp to the "-" terminal and the red cable clamp to the "+" terminal.Tighten the clamps and you're done and ready to get on your way.
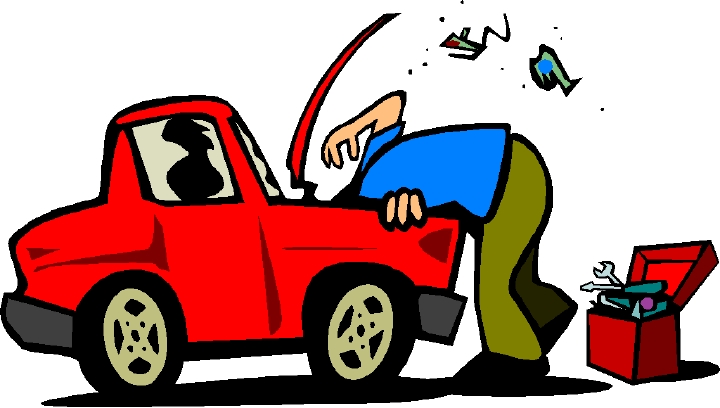
Are you having problems with your car? Does it seem like it's not running as well as it should be, or not running as smoothly as it used to? You may be thinking that it's time to look for a professional mechanic, but that may not be the case at all.There are some small, basic problems that many cars have, and you may be able to take care of yourself!A common problem that many car owners have is hard starting.Hard starting is caused when your vehicle cranks slowly, which can be the sign of a low battery.If the battery is low, then you engine may also fail to turn over at all! Recharging your car's battery is possible, but if the battery is old or damaged, then replacing it may be your only option.Before you can do anything with the battery, you need to know what its current charge is.The charge level depends on how much acid the battery has inside it. if it has a higher concentration of acid, then it will have a higher gravity, which means it will have a higher charge level.If you have a battery with a removable cap, then you can check the charge level with a hydrometer.Some hydrometers contain a number of colored balls; the number of balls that float tells you the approximate level of charge that your battery currently has.If all the balls were floating, then it would indicate a fully charged battery.If no balls were floating, then it would indicate a dead or fully discharged battery.If your battery is low and undamaged, driving for approximately thirty minutes should recharge it.You can also use a fast charger, which plugs into any normal outlet and is then attached to your car's battery via cables that resemble jumper cables.Battery problems can happen at any time and any place, though, and may actually be covered by some car insurance.Another common problem that car owners don't always consider is a blown fuse.If your headlights suddenly stop working, then before calling an auto shop, you should look at your car's fuse box.Modern cars commonly have two fuse boxes, and normally use a "blade" type of fuse (older cars use ceramic and tube fuses).Once you have located your car's fuse box (generally somewhere around the driver's or passenger's seat), you will need to remove a plastic cover to get to them.This cover will have a diagram of what fuses go where, and may even contain spare fuses, along with a pulling tool.Simply look at the diagram, find the proper fuse (in this case, the one for the headlights), and look to see if the "bridge" of the fuse is melted.If it is, then you will have to replace it.If not, then your car may have bigger problems.Both of these tips should help you with small car problems, and are sure to give you a sense of accomplishment once you learn to do them yourself.
A car battery's life can be shortened if not maintained correctly, to keep a battery in top condition here are some tips that may help.After all some batteries can be very expensive to replace, make sure you get your monies worth from them.Make sure the battery is fitted in the correct compartment of your vehicle, the battery tray should be clean and rust free and it should be a good level surface.The battery should be kept securely in this battery tray.Regularly clean the terminals and terminal connectors, if there is any signs of corrosion on the terminals then wash off with hot water and clean with a wire brush.Apply grease to the terminals and make this an important maintenance task.Make sure the electrolyte level is maintained at the correct level never overfill or underfill a car battery.Always use demineralized or distilled water and never use tap water or bottle water.If you have to replace a battery always disconnect the - negative terminal first and then the + positive, when the securing nut is slackened off always twist the terminal to release the hold and never just pull up.When fitting a new battery, apply a good quality grease first to the terminals and then connect the + positive first and then the - negative.If a battery has to be charged away from the car, then always charge in a well ventilated area, always away from any naked flame.It is best to use a trickle charge if possible, this will ensure the battery receives a good thorough charge.Problems with a vehicles charging system are not always the fault of a battery, other electrical items fitted to a car can cause problems.If you suspect you have a problem with a car battery, then it is always a good idea to have the battery checked first.A battery can be tested by either checking it's charging rate by using a multi meter or a hydrometer can be used to check the electrolyte in each cell or a discharge rate tool can be used.This is connected across both terminals and a heavy discharge is applied to the battery.The readings are monitored and a report on the battery condition is then given.A faulty starter motor can also have an effect on the vehicles cranking ability, if a starter is faulty it can often turn the engine over slowly or even not at all.These are symptoms very similar to a flat battery.Another simple test you can do yourself is to wait until it is a little dark and start your car engine.While facing a wall or fence turn your lights on.If you increase the speed of the engine while looking at the lights on the fence or wall ahead, you should see the lights get brighter.If the lights do get brighter it will show that the charging system of this vehicle is working and the alternator is not at fault.
An industrial generator (a.K.A.Genset) can last for decades, but only if it is properly maintained.Although a generator has few moving parts, it contains sensitive components that need regular attention.Complete genset maintenance requires different measures to be performed on different schedules.If you need a schedule for performing these measures, below is a basic checklist for diesel generator maintenance on a daily, monthly, semiannual, and annual basis.Daily Measures.Diesel generators should receive the following measures on a daily basis..General inspection - Check the genset for loose parts, signs of corrosion on parts, traces of carbon, and dust build up.Coolant heater check - Make sure the coolant heater is securely in place and inspect it for signs of wear.Oil check - check the oil level and add oil as necessary.Fuel check - check the fuel level and add fuel as necessary.Charge-air piping check - be sure the charge-air piping is connected securely to the radiator and inspect it for signs of wear.Maintenance personnel commonly perform the measures above.Generator technicians can also perform them as part of a scheduled service agreement.Weekly Measures.Diesel generators should receive the following measures on a weekly basis..Air cleaner check - Check the air cleaner for debris and clean it as necessary.Battery charger check - Check the float voltage reading on the battery charger and adjust the voltage as necessary.Fuel Filter Drain - Drain the water from the bottom of the fuel filter housing.Fuel Tank Drain - Drain the water from the bottom of the fuel tank until the diesel fuel appears.Many facilities have generator technicians perform the weekly measures on a generator maintenance checklist.If building maintenance personnel perform them, they should have training in generator maintenance.Monthly Measures.Diesel generators should have the following measures performed on a monthly basis..Coolant concentration check - Take a sample of the coolant with a hydrometer and check its concentration by referring to the service manual from the manufacturer.Drive belt tension check - Check the belt for proper tension and inspect it for signs of wear.Exhaust condensate drain - Drain the condensate from the condensate trap.Battery check - Check the charge on the starting battery and examine the connections for looseness and corrosion.Because the correct concentration of coolant in an outdoor generator may be influenced by climate, a generator technician that specializes in emergency power equipment in the Carolinas should perform the coolant concentration check.Semiannual Measures.Diesel generators should have the following measures performed on a semiannual basis..Oil and filter change - Replace the oil and oil filter, regardless of whether the genset has been used in a non-simulated power outage.Coolant filter change - Replace the coolant filter, regardless of whether the genset has been used in a non-simulated power outage.Crankcase breather cleaning - Clean the crankcase breather according to the service manual from the manufacturer.Air cleaner element change - Replace the air cleaner element, regardless of the level of debris accumulation.Radiator hose check - Check the connection of the radiator hoses and inspect them for signs of wear.Fuel filter change - Change the fuel filter, regardless of the level of sediment accumulation.Generator technicians should perform the measures above.Annual Measures.The genset should have a thorough annual cleaning of its cooling system.Conclusion.The measures above are required for a diesel generator to stay in excellent condition.By incorporating them into a generator maintenance checklist, you can prepare the generator in your facility for the next power outage.Although building maintenance personnel can perform some maintenance measures, many of them deal with components and types of inspection that are specific to diesel generators.Unless maintenance personnel are trained in these measures, they should be performed by a power service that maintains emergency power equipment in the Carolinas.
If you are the proud owner of a good quality electric golf cart, then you have a lot more things to do to ensure the life expectancy of your cart.Since you have bought an electric golf cart, regular checking of the cart's batteries are highly important to let it run for longer.If you are not sure of how to check the golf cart for bad batteries, then here are some important tips that will help you.You can check the batteries of any voltage or configuration easily by following the tips that we provide here.In order to start the task, you will first need things like a hydrometer, volt meter, safety gloves and safety glasses.Since lead acid batteries can be hazardous for direct contact, it is always recommended to wear safety gloves on your hand when working on them.Utmost care should be taken while handling the cart batteries.In order to check whether you battery is at good condition, charge them immediately.Give them full charge and if you have an automatic charger that would be ideal.Always follow the instructions when using manual charging.Once you have tested the batteries for full charge retention, the next step is to check for the On-Charge Voltage.After charging the cart, set the volt meter to 200v dc to start checking the voltages of the individual batteries separately.When starting with the one battery, place the voltmeter's positive lead on the positive side of the battery and the voltmeter's negative lead on the negative side of the battery.Repeat with all the batteries in this manner to check the voltage of all of them.Each of the batteries should read around 7.0v for a 36v cart with 6 batteries.And each battery should read around 9.3v for 48v cart having 8 batteries.Remember that if the voltage of the battery does not read as said above, then you have to know that it is time to replace those batteries with a new one.The next is the hydrometer test.After placing the hydrometer with all the batteries, take the readings of them one by one.The readings should say 1100 to 1300 where 1100 being water and 1300 is the acid.The batteries should be replaced if there is a difference of 50 points or more.
Battery reconditioning for car batteries has become a great way to save a bunch of money and help the environment.Car batteries are very popular to recondition because the savings add up very quickly.The initial outlay is quite small and with your very first battery you can save money.Before you start reconditioning your car battery there are a couple things you should do first.I highly recommend getting a guide for reconditioning batteries because there are several tips and tricks that can improve how well it works after the process.The first step to reconditioning your car battery is to do a quick test of the voltage.As long as you get a reading that's above 0V you're good to go to continue with the process.If the battery does read 0V that doesn't mean it can't be reconditioned though.Hook up the battery to a trickle charger overnight and take a reading the following morning.If it's holding at least a little bit of a charge you can proceed.Once you've verified that your battery is a suitable candidate to be reconditioned you can start the process.You'll need to gather all the materials you're going to need such as a desulfator (or nanopulser), de-ionized water (to fill the water level in case it gets low), as well as a hydrometer and multi-meter.After hooking the battery up to the desulfator it's pretty much just a waiting game.You let it run for a couple days and check the specific gravity as well as the voltage and apply an equalization charge.After doing this for a few times you will notice that the battery is starting to hold a charge again.Once the battery hits 14 volts after an equalization charge you can stop reconditioning it because it's in almost brand new condition.As I mentioned earlier you should get a guide to help you with the reconditioning process because you need to follow it closely to have real success.I personally have been reconditioning car batteries for quite some time and actually do others as a little side business.It makes me some extra money and it also helps the environment by keeping them from the dump for a little while longer.
A motorcycle battery comes with a huge amount of energy to make large engines run with utmost efficacy.They have the capacity of empowering a motorbike and they can even help the vehicle run with enhanced efficiency.The sizes of the motorcycle batteries are small.This is because they have to be fitted in a smaller area as the vehicles for which they are used are comparatively concise.They also do not have the ability to provide electrical power for different accessories.The battery should only have the strength to start the engine.Thus, a minimum amount of amperage is required for the purpose.Certain Essential Facts about Motorcycle Batteries .A motorcycle battery is less expensive when compared to other automobile battery types.The battery is small, the battery is light and the such contains less amount of acid and thus the manufacturing costs of motorcycle batteries are reasonably less.Moreover, as the batteries are smaller and lighter the cost of shipping is also less.Thus, it is not much an investment buying motorcycle batteries.Thus, once the battery runs out of life you must at once make arrangements to replace the item as soon as possible.A motorcycle battery needs proper care and maintenance.Thus, you must make sure to use the right equipments and practices in trying to deal with these such types.Some of the essential tools required to deal with a motorcycle batteries include battery tester, hydrometer, jumper cables, battery analyzer and digital multimeter.All these tools have individual roles to play in taking care of the battery and making it perform with enhanced efficacy.You must always check with the condition of the battery at regular intervals of time.For this you require a monthly top of charging and a regular and fixed inspection from the company.The specialty about Lifeline Batteries.When talking about several battery types you can also talk about the massive powerful marine batteries and the lifeline such is one such variety.These are batteries which help vehicles move smoothly on the water.These aquatics batteries are specially designed in order to make huge vessels flow with safety and greater power.The kind of transport running over water should be properly empowered and this is the reason why the lifeline batteries are in huge demand.This battery has passed all tests to prove its ability on water.Much care is taken in the making of the lifeline battery.As the name suggest the batteries are meant to guard lives.They help the vessels run with safety as the transports are most of the times overloaded with passengers and cargos.When running on water the vessels may stop functioning immediately in case of any technical fault and this fault can be with batteries as well.Thus, before every vessels start for aquatic journey, arrangements should be made in checking with the condition of the such in order to avoid all problems over the water.Thus, efficient engineers are employed for the purpose to check with the batteries as well as with other parts of the vessels as well in order to ensure a safe and secured voyage.
It's almost that time again to pull the family RV out of moth balls and go have some fun!As April approaches, the calls to me begin stacking up from concerned RVers.I'm a mobile RV Tech and every spring I encounter the same question from RVers across the country - "What can I do to get my unit ready for camping season?" So I want to pass on some RV information and a few simple tips to, hopefully, save you some time and money and help you get your rig ready to roll!Awnings.On a sunny day, extend your awning to air it out.Trapped moisture may have caused mildew which will damage and stain the fabric, so use a hose to rinse it off.You can scrub down a vinyl fabric with mild dish detergent; for canvas or cloth, your favorite RV Dealer can supply you with an appropriate cleaner.Allow it to dry thoroughly before retracting.Run the awning in and out a few times to ensure smooth operation and check that the travel locks work and that all hardware is secure.Propane System.This is a good time to fill your bottles or tanks and check for leaks.Spray a leak detector (available at hardware stores) or soapy water around the connections and regulator.If you see bubbles (or smell propane at anytime), you should have the system tested.Don't take chances with your propane system - it's not worth it!Never overfill your propane tanks.Propane expands and contracts drastically with temperature changes.Any vessel holding propane should not be filled more than 80% to allow for expansion.A major problem arising from overfilled tanks is this. all appliances on RVs use the propane vapor (not the liquid) from the tank and propane contains a certain amount of oil.If a tank is over filled, the liquid (and oil) can get into the system and do some real nasty things.I often see the oil ruining regulators and any oil getting past the regulator can clog the lines on the coach.If you ever see a 'pulsing' flame on your stove top, or if your furnace works great on a warm night but not on a cold one, you may have oil in the lines!Batteries.Batteries are finicky things.Some last for years and others crater soon after being installed.After charging the batteries, I use a hydrometer to check the specific gravity.Any auto parts store sells easy-to-use hydrometers.Follow the instructions and test your batteries.Remember. a 25 point differential between cells means you have a bad cell and the battery is "kaput"!If the batteries check out OK, clean the connections, make sure they're snug and apply an anti-corrosion spray.DC Electrical System.After the batteries are hooked up, check your DC accessories and lights.If not working, check the fuses and connections.If you find a blown fuse, you need to investigate.Mice, squirrels and other critters can build nests, chew wires and cause all kinds of problems that you'll need to correct.Never increase the value of the fuse; you could turn a small problem into a big one!If all appears well, ensure the converter is working properly.Do this by using a voltmeter to check the battery voltage.When a battery is fully charged it should read about 12.6 volts.When you plug in to shore power and the converter starts working, you should see 1 to 1.5 volt increase and if the lights in the coach get a little brighter, you should be good to go.A/C Electrical System.With the coach plugged into shore power you can check the electrical outlets with a hair dryer which puts a good testing load on the system.Check the GFCI, (Ground fault circuit interrupter).It's that little button you play with (usually while sitting down) in the bathroom.Push the test button and the reset button should pop out.If it does, push the reset button back in until it clicks.If it doesn't, you have a problem and need to have it repaired.Don't run with a defective GFCI.These little gizmos save a lot of lives every year! They're there to protect you and your family.Sewer Valves.These are one of the most over looked items on an RV.Before you run any water into the tanks, check to make sure the valves all move freely.Anything other than medium pressure to operate them might suggest it's time for new ones.A broken black tank sewer valve is an RV Tech's nightmare and a big expense for the customer.These valves are under 10 dollars and are usually quite easy to replace.Water Systems.If your unit was winterized with good quality antifreeze, your water lines might be sufficiently sanitized, but filling the holding tank and using bleach tablets or other sanitizing product is a good idea.I flush mine every year.It's good practice, especially if you use a variety of watering stations throughout the season.Another thing often overlooked while de-winterizing is changing the position of the water heater by-pass valve.There are a few different types of bypass valves so get to know how yours works.Valves in the wrong position will cause a lot of grief and may give you the impression the water heater isn't working properly.The water pump is one of the best tools to alert you to a leak in your water system.Pressure up the system and listen for a few minutes.If the pump remains quiet and doesn't kick in and out, quite likely the system is ok.If it runs on and off, get your flashlight and check the lines and water accessories for leaks.The only two things I know of that will make the pump burp on and off is a water leak or a defective switch on the pump.**An air compressor is a handy thing to have for the next few tips .Water Heater (Pilot Model).On a pilot light model (one that is lit manually), blow any debris out of the chimney (the opening where the fire is lit) and out of the burner assembly.Even a spider web in the burner assembly can shut down your water heater, so make sure it's clean! Wear safety glasses and stand aside while doing so.Next, make sure the water heater is full and light the pilot light.If it lights quickly and stays lit after the button is released, great! However, if the flame is small, the orifice might need cleaning.If the flame is good but it won't stay lit, unfortunately you may need an RV Tech to install a new thermocouple or gas valve.If all is well, turn the gas valve to "ON".With all propane appliances we are looking for a nice, blue flame.Allow the water heater to get to temperature and run some hot water until the heater re-lights.If it does, you're set to go!Water Heater (Auto Light or DSI Direct Spark Ignition).As with pilot models, clean thoroughly with air.Make sure there is water in the tank and the switch is in the "OFF" position.The only real owner-serviceable part on this water heater is the electrode - the gismo that sparks when lighting.Check the gap between the electrode and ground (most units require the gap to be 3/16 ths of an inch).If the gap needs adjusting, you may want to replace it.You can adjust it yourself, but use caution not to break the porcelain around the electrode.If you do, you'll definitely need a new one.Turn the heater "ON".When it reaches temperature and shuts off, run some hot water.If the heater re-lights, the flame is a nice blue, the water is reheated and it shuts off again, you're good to go.If you turn the water heater on and it struggles to light or lights and quickly goes out again, you'll probably need to contact a technician.Furnace.There are really no owner-serviceable parts on today's furnaces.One thing I suggest is to fire it up and cycle it a few times to see if it lights and shuts down on demand.At the first of the season, I run mine for about 10 minutes with the door and windows open.This gives the furnace a bit of a workout and airs out the vents in case little critters are raising a family in there!Refrigerator.Again not many owner-serviceable parts but there are some things we can do to ensure it's working properly.When fridges operate on propane, the chimney becomes coated with a brown, flakey soot that, if not removed, can fall onto the burner assembly and shut down the fridge.You'll need to remove the lower outside cover to get to the burner assembly.With the fridge "OFF", use your air compressor to blow upwards into the chimney to remove any soot.Thoroughly blow out the burner assembly.While you're there, look up inside the fridge compartment for any blockages.During long periods of disuse, squirrels, birds and other critters can make nests up there and block the airway.It's critical to keep this area clear - if the fridge can't breathe, it won't work properly.AC Units.On the roof, visually inspect the condition of the cover and the fins on the back side of the Air Conditioner.If the cover is cracked or broken, change it right away.If it breaks apart while you're driving, it can cause severe damage to the internal working parts of the A/C (not to mention the problems created when it lands!).Weather often damages the radiator on the back of the A/C unit.Like fridges, these units need to breathe, so if the aluminum fins are flattened or pushed in they need to be straightened.There are inexpensive kits you can buy to do this; it just requires a nice day and a bit of patience.If you have a good power supply going to your RV, turn on the air conditioner and run it for 10 or 15 minutes to ensure that it is cooling.Wheels and Brakes.Every year someone unnecessarily burns a wheel bearing off of their unit and it's very expensive to fix! The standard I preach with great conviction is this. "Have your bearings and brakes serviced every 2 years or 10,000 miles." If you follow that rule you will, in most situations, be safe from harm.Remember, an ounce of prevention is worth a pound of cure.Well, there you have it - a few easy-to-do tasks that may well save you big bucks at the repair shop.So, strike out for the RV vacation you've always dreamed of and - HAVE FUN OUT THERE!